|
|
Mission
4: Area 51 - Rescue
|
|
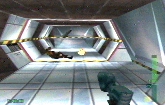
 Partial map for the main part of the level - After you blow up the wall,
and reach the heart of the base. Partial map for the main part of the level - After you blow up the wall,
and reach the heart of the base.
All
Objectives are completed in this area, which is a repetitive
hallway, and a place where you can easily get turned around.
|
|
Area 51 - Rescue:
Overview
|
|
1:
Destroy computer records
2:
Locate conspiracy evidence
3:
Obtain and use lab technician disguise
4:
Gain access to autopsy lab
5:
Rescue the crash Survivor
|
|
Background
-
|
|
A
craft carrying Institute advisors has been shot down in
Nevada. Debris from the crash and the bodies of the advisors
have been taken to Area 51. A spy inside the base has managed
to get footage to the Institute of a possible survivor.
This mission is to rescue that survivor.
|
|
DetErest
-
|
|
A
level that is actually relatively simple, but appears more
complex because of the layout of the Area 51 building. A
key to beating this level with ease, is to leave the mechanic
wearing the overalls in the previous mission alive, when
he's working on the interceptor. He will then be found behind
a locked door, and open it for you, for you to find a Phoenix
up higher. The Phoenix's second function Explosive Shells
are no match for the bullets from enemy Dragons.
|
|
  One
of the toughest parts of the level is the beginning. You need
to head up a lift. But before you do, you'll likely have to
deal with a large number of guards patrolling around crates.
There are several patterns you can follow to minimize damage
to your health. Find the one that works best for you. If you
are quick and stealty enough, you can shoot the first guard
you see in the back, call the lift, and jump back between two
rows of crates as you wait for the lift to come down to your
level, and not have to deal with any other guards. One
of the toughest parts of the level is the beginning. You need
to head up a lift. But before you do, you'll likely have to
deal with a large number of guards patrolling around crates.
There are several patterns you can follow to minimize damage
to your health. Find the one that works best for you. If you
are quick and stealty enough, you can shoot the first guard
you see in the back, call the lift, and jump back between two
rows of crates as you wait for the lift to come down to your
level, and not have to deal with any other guards.
|
|
  On
your way up the lift, guards may appear above, shooting down
at you, if they saw you earlier. Exit the lift, and if you knocked
out but did not kill the mechanic in the previous level, head
to the right, down the very long walkway, to where a lone guard
awaits. Kill him, and try to open the door, and the mechanic
will open it for you. After this, head back to the lift, and proceed forward. On
your way up the lift, guards may appear above, shooting down
at you, if they saw you earlier. Exit the lift, and if you knocked
out but did not kill the mechanic in the previous level, head
to the right, down the very long walkway, to where a lone guard
awaits. Kill him, and try to open the door, and the mechanic
will open it for you. After this, head back to the lift, and proceed forward.
|
|
  Right
past the lift, and to the left, is a guard. After him, keep
heading forward, where two more guards are visible in front
of a door if they haven't heard you yet. Through that set of
doors, head left, and call the lift. Right
past the lift, and to the left, is a guard. After him, keep
heading forward, where two more guards are visible in front
of a door if they haven't heard you yet. Through that set of
doors, head left, and call the lift.
|
|
  Guards
are visible running on the walkways above. You can easily shoot
them with the Phoenix. You can even shoot them from below, by
hitting the walkway above you. There are four guards, and they
will usually try to take the lift down to get you. As the lift
comes down, shoot it's bottom to kill the guards who are on
it. Guards
are visible running on the walkways above. You can easily shoot
them with the Phoenix. You can even shoot them from below, by
hitting the walkway above you. There are four guards, and they
will usually try to take the lift down to get you. As the lift
comes down, shoot it's bottom to kill the guards who are on
it.
|
|
  Get
in the lift, and head up. Once it opens at the top, you can
shoot an explosive Phoenix shell at the base of a white pillar
on the opposite side of the room, to open the wall. Follow the
walkway, until you get there. Get
in the lift, and head up. Once it opens at the top, you can
shoot an explosive Phoenix shell at the base of a white pillar
on the opposite side of the room, to open the wall. Follow the
walkway, until you get there.
Once
through the blown wall, head left. A guard is usually found
somewhere ahead in that hall. The hall does not curve, so keep
going until the end of it.
|
|
  At
the very end of the hall, open the door on the right, to find
a guard with his back turned. Shoot him, then shoot the door.
A Biotechnician is on the other side of the door, so shooting
the door will usually kill him. Head inside the door, into a
round room with a central column. Hit the first red switch on
the left, to make one of the holds rise up. At
the very end of the hall, open the door on the right, to find
a guard with his back turned. Shoot him, then shoot the door.
A Biotechnician is on the other side of the door, so shooting
the door will usually kill him. Head inside the door, into a
round room with a central column. Hit the first red switch on
the left, to make one of the holds rise up.
|
| Face
the rising hold, and activate your X-Ray Vision. An alien
body is visible, and you just have to hold your aimer on
it long enough to scan it, and prove that it is conspiracy
evidence. Objective
2: Complete.
In this time, guards will usually come to the door of that
room. Phoenix blasts or Dragon Grenade rounds to the floor
will wipe them out. |
Head
way back, all the way, past where you blew up the wall before.
The hall curves to the right. After the curve in the hall, and
straight forward, a guard is in front of a door on either side
of the hall. Blast them both, and open the door to the right.
Destroy the computer terminal that you first see, and one of
the Technicians (or both) will usually get caught in the blast.
Kill both of them, or they'll activate the drone gun in the
room, and you'll likely take a bullet before you destroy it.
|
|
 Use
you DataUplink on the farthest computer from the door. It will
load a virus, causing the locks on some doors to short circuit.
Head out of this room, and to the left. Head down the hall,
to the first room on the right. Guards await in this room, as
well as a Technician.. Use
you DataUplink on the farthest computer from the door. It will
load a virus, causing the locks on some doors to short circuit.
Head out of this room, and to the left. Head down the hall,
to the first room on the right. Guards await in this room, as
well as a Technician..
|
|
  Once
all guards are taken care of, blow up the only computer in that
room, to destroy the computer records. Objective
1: Complete.
Head out that room, and to the left, past where you used the
DataUplink, and to the end of the hall. Open the door, and a
guard in the massive hangar will jump down, and head your way.
Blast him. Once
all guards are taken care of, blow up the only computer in that
room, to destroy the computer records. Objective
1: Complete.
Head out that room, and to the left, past where you used the
DataUplink, and to the end of the hall. Open the door, and a
guard in the massive hangar will jump down, and head your way.
Blast him.
|
|
  Peek
your head in, to attract the rest of the guards, then step way
back into the hall. Arming yourself with the Dragon's Grenade
Function works best to clear them out. Once that pack is destroyed,
head into the hangar, up the ramp, and across the wiry bridge,
to the vents. You'll drop down into the shower room. Two guards
patrol inside, and a Lab Technician is in the shower area. Kill
him. Peek
your head in, to attract the rest of the guards, then step way
back into the hall. Arming yourself with the Dragon's Grenade
Function works best to clear them out. Once that pack is destroyed,
head into the hangar, up the ramp, and across the wiry bridge,
to the vents. You'll drop down into the shower room. Two guards
patrol inside, and a Lab Technician is in the shower area. Kill
him.
|
|
  There
are a bunch of lockers beside the lab technician, and on Perfect
Agent, the Lab Technician Disguise is in a random locker. You
can search them all, or take a look with your X-Ray vision to
find out which locker it's in. Just open the door and grab it.
Select it from your inventory, and activate it to wear it. Objective
3: Complete.
Head out of the showers through a door on the inside, and back
to the main hall. There
are a bunch of lockers beside the lab technician, and on Perfect
Agent, the Lab Technician Disguise is in a random locker. You
can search them all, or take a look with your X-Ray vision to
find out which locker it's in. Just open the door and grab it.
Select it from your inventory, and activate it to wear it. Objective
3: Complete.
Head out of the showers through a door on the inside, and back
to the main hall.
|
|
  Head
straight once in the hall, all the way, and follow the hall
as it turns left. After you see the hole you blasted in the
wall, enter the first door on the right. Kill the two guards
that patrol inside it, and put away your weapon. When you reach
the end, a guard will let you into the lab, thinking you're
a real Technician. As soon as he opens the door, arm yourself,
and kill him. Head
straight once in the hall, all the way, and follow the hall
as it turns left. After you see the hole you blasted in the
wall, enter the first door on the right. Kill the two guards
that patrol inside it, and put away your weapon. When you reach
the end, a guard will let you into the lab, thinking you're
a real Technician. As soon as he opens the door, arm yourself,
and kill him.
|
|
  Two
Technicians are also in that room, and the last one you kill
will drop a key that will let you into the autopsy lab. Objective
4: Complete.
Turn around, and use either Dragon Grenade Rounds or Phoenix
shells to wipe out the Biotechnicians and other guards who will
now enter the room. Head through the doors, and through that
big room, being prepared for guards hiding anywhere. Two
Technicians are also in that room, and the last one you kill
will drop a key that will let you into the autopsy lab. Objective
4: Complete.
Turn around, and use either Dragon Grenade Rounds or Phoenix
shells to wipe out the Biotechnicians and other guards who will
now enter the room. Head through the doors, and through that
big room, being prepared for guards hiding anywhere.
|
|
  You're
relatively safe behind this glass wall, and can kill the few
guards in that room as they rush around at you. Once the last
one is fallen, find his key, and head around the other side
of the glass, through the door, around the corner, and open
the door to the operating room. Opening the door ends the mission,
and saves the crash survivor. Objective
5: Completed. You're
relatively safe behind this glass wall, and can kill the few
guards in that room as they rush around at you. Once the last
one is fallen, find his key, and head around the other side
of the glass, through the door, around the corner, and open
the door to the operating room. Opening the door ends the mission,
and saves the crash survivor. Objective
5: Completed.
|
|


